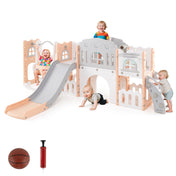
Complete Guide to Setting Up Your Wooden Baby Playpen
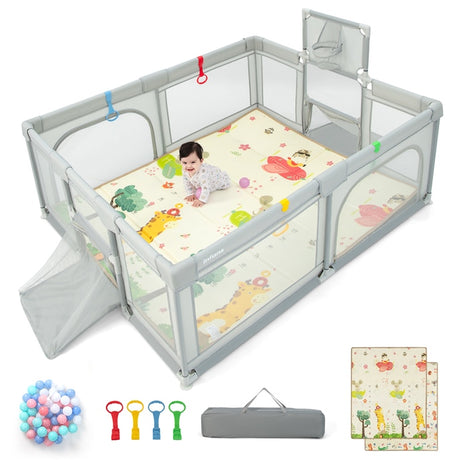
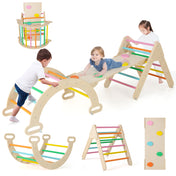
Creating a safe space for your little one is a top priority for any parent. A babyjoy kids baby playpen provides a safe space where infants and toddlers can explore, play, and rest. It also gives parents peace of mind.
If you recently bought the Wooden Adjustable Multi-Shape Baby Playpen, this guide will help you. It covers key safety warnings and step-by-step assembly. This will keep your infant playpen sturdy and secure.
Important Safety Information Before You Start
Before diving into the assembly, it is crucial to prioritize safety. We designed this solid wood children’s playpen for specific age groups, and you must handle it carefully during setup.

General Warnings
- Adult Supervision Required: The product must be installed and used under the constant supervision of an adult.
- Choking Hazard: Keep all small parts and packaging materials away from babies and children to avoid any choking risks.
- Age Limit: Use this playpen with children aged 6 to 24 months.
- Surface Safety: Always place the assembled playpen on a flat, steady, and stable surface.
- Location: Never place the playpen close to an open fire or other high-heat sources.
Pre-Assembly Checklist
- Read the Manual: Carefully read all instructions and keep them for future reference.
- Inventory Check: Remove all packaging, separate all hardware, and count every part before starting.
- Correct Order: Follow each assembly step carefully and in the proper order to avoid dangers caused by incorrect installation.
Hardware and Parts List
To build your wooden baby playpen, ensure you have the following components ready:
Main Panels
- Ax3: Large standard panels.
- Bx2: Medium standard panels.
- Cx1: Connecting panel.
- Dx1: Activity panel with built-in toys.
- Ex1: Ventilated/decorative window panel.

Connectors and Hardware
- Fx8: Straight connectors.
- Gx8: Corner/Angle connectors.
- Geometric Accessories (Hx1 to Nx1): Various shapes for the activity panel.
- Ox1: Allen key for tightening.
- ax16: Assembly screws.

Step-by-Step Assembly Instructions
For the easiest setup, assemble the items near the playpen’s locati0n. This avoids moving the heavy wooden structure.
Step 1: Preparing the Side Sections
- Begin by connecting component B to component F.
- Attach the connected parts to component A.
- Secure everything with two screws (a). You will need to repeat this step twice to create two main side sections.

Step 2: Corner Connections
Take the four G components (corner connectors) and attach them to the main body sections you just created. Fix one side of each connector using 2 screws (a).

Step 3: Expanding the Frame
Connect components A and E to both sides of your main body structure. Again, secure one side of these connections using 2 screws (a).

Step 4: Adding the Straight Connectors
Attach the remaining four F components (straight connectors) to the main body. Ensure you fix one side with 2 screws (a) to maintain the structure's integrity.

Step 5: Installing the Door and Activity Panel
Connect components D (the activity panel) and C (the gate panel) to the main body. Use 2 screws (a) on one side to lock them in place.
Pro-Tip: To operate the door, simply pull up on the designated locking mechanism to open the gate.

Step 6: Final Corner Securement
Attach the final four G components to the remaining corners of the main body, fixing one side with 2 screws (a).

Step 7: Completing the Loop
Finalize the assembly by connecting the side sections you assembled in Step 1 to the main body. Use the last 2 screws (a) to fix the side and complete the playpen enclosure.

Essential Maintenance and Care
To keep your toddler playpen safe and looking new, follow these maintenance tips:
- Weekly Check: Every week, check the tightness of all connecting parts, including screws and buckles. Tighten them immediately if they are loose.
- Cleaning: Wipe dust from the surface with a slightly damp cotton cloth, then dry immediately with a dry cloth. Pay close attention to handrail gaps and door bolts.
- Sun Protection: For any plastic parts, avoid direct sunlight to prevent aging, brittleness, and discoloration.
- Base Requirement: Warning: Do not use the wooden playpens without the base.
By following these simple steps, you can provide your child with a high-quality, wooden play area that is both functional and safe. Always remember that while a playpen is a great tool, it does not replace active adult supervision. Never leave your child unattended while they are playing.